Wednesday, July 21, 2010

Cool as a Cucumber


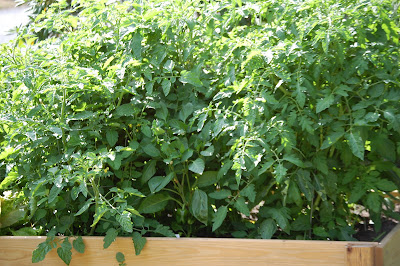
Remember Mr. McNeedham's garden? Well it hasn't stopped growing. In fact, every day there are surprising discoveries, like giant cucumbers hiding under dense vines. And what does one do with said cukes? One makes margaritas, of course!

The recipe for these unbelievably refreshing adult beverages is really too easy--cucumbers are sliced up, then blitzed in the blender with a squeeze of fresh lime juice, your favorite tequila and a splash of triple sec. One sip of these will have you feeling cool as a cucumber too, no matter how hot it is outside.

I think this might very well be my next favorite cocktail....of course I say that about everything! And if you enjoy margaritas, may I highly suggest the purchase of the citrus squeezer? It's a real time saver, and as you know, when mommy needs a drink...time is of the essence.


Cucumber Margarita

This cool cocktail is a fantastic way to use up those rogue cucumbers sprouting in the garden. It is light, refreshing and is easily multiplied so that you can make a whole pitcher for your thirsty guests.

Prep time: 5 minutes
Total time: 5 minutes
Yield: 2 drinks

Ingredients:

6 slices of cucumber (about 1/4 inch each), peeled and seeded if desired (good to do if it's kind of a big, home-grown cucumber)
4 ounces of tequila
2 ounces of triple sec
Juice from 2 limes
3 handfuls of ice
Salt and cayenne pepper

Preparation:

1. Place cucumber, tequila, triple sec, lime juice and ice in the blender. Pulse until blended.

2. Sprinkle salt and cayenne pepper on a plate. Rub the rims of 2 glasses with the squeezed limes. Dredge rims across the salt/cayenne mixture so they have an even coating of salt.

3. Pour blended margarita into the glasses. Serve immediately, garnished with additional cucumber slices if desired.

Saturday, July 17, 2010

Summer Spice Is So Nice


Native corn is here...and it's sweet and juicy and so very tender. We love to eat it on the cob, dripping with butter and sprinkled with salt and pepper. But when we've had our fill, and want to mix it up a bit, we eat it this way--creamed, spiked with slivers of spicy roasted chiles, and smothered with cotija cheese.

You may think that it's a bit sacrilegious to eat Cape Cod corn prepared in such a manner, but I think it rather likes to be dressed up a bit. Everyone needs a little spice in her life every now and then, right? If you can't find cotija cheese in your market, look for a good quality salty feta cheese to crumble on top.


Smothered Mexican Street Corn

While you can use frozen corn to make this recipe, fresh, seasonal, and local corn tastes best. Look for cotija cheese and creme fraiche in the dairy section of your regular market, but in a pinch, feta cheese and sour cream can be substituted with good results.

Prep time: 20 minutes
Total time: 40 minutes
Yield: serves 4-6

Ingredients:

5 ears of corn, shucked, cleaned of silks and cut off the cob
3 fresh poblano chiles
2 tablespoons butter
1 medium onion, diced
1/2 teaspoon ground cumin
1 cup of chicken or vegetable stock
salt and pepper to taste
1/3 cup creme fraiche or sour cream
1/2 cup cotija or feta cheese, crumbled

Preparation:

1. Roast poblano chiles over an open flame on a gas burner or under a broiler, using tongs to turn frequently, until the skin has blackened on all sides. Wrap in a paper towel and set aside for 5 minutes.

2. Using the paper towel, rub the skins off the chiles, then remove the stem and seeds. Cut each chile into 1/2 inch strips, then again into 1/2 inch segments. Set aside.

3. Melt butter in a large skillet over medium low heat. Add onion and cumin and cook, stirring occasionally, until onion is translucent and soft, about 5 minutes.

4. Stir in corn, chiles and chicken stock and bring to a boil. Reduce heat and simmer, stirring occasionally until corn is tender, about 10 minutes. Stir in creme fraiche and cook for 2 minutes more. Taste for seasoning and add salt and pepper if desired.

5. Pour into serving bowl and sprinkle with cotija cheese. Serve immediately.

Saturday, July 10, 2010

Mr. McNeedham's Garden

Once upon a time, a man built 3 large garden boxes for his wife. He filled them with good soil, seeds and seedlings, and gave them lots of water and attention. The wife was very happy, and so was the husband.


Every day the man went out to the garden and watered it well. Petra Rabbit and her sisters stayed far, far away, because of the cats Mama, Kebo and Cali, who patrolled it with great enthusiasm. The spring was unusually warm with plenty of sun, and so the garden grew and grew. The wife was happy, and so was the husband.


Every day, it was more of the same....sun and water, sun and water. The seeds sprouted, the flowers blossomed and the garden grew and grew. The wife was happy, and so was the husband.


Suddenly, in the beginning of July, the garden was so big! And it kept growing and growing and growing. And still there was more sun and warm air. The neighbors all came over to admire the garden, and said that they had never seen anything like it!

It is true that the wife was still happy, but she became worried that she wouldn't be able to eat all the kale. And she became cross that the crook-neck squash turned out to be zucchini (she hates zucchini).

So luckily, her lovely daughter and daughter-in-law came over to lend their assistance.


They picked a huge bag of kale (and also some of that evil zucchini) and took it to their house to make kale chips.

First they washed it well, and tore it into bite sized pieces, removing any thick stems.


Then they tossed it in a splash of olive oil, and sprinkled it with sea salt.


Finally they placed all the coated leaves on a large baking sheet, and baked them at 325 degrees for about 15-20 minutes, until the leaves were crisp...like a chip!


The wife was less worried when she realized that so much kale could be used up this way. And also excited that the chips were so delicious and nutritious. And it should be mentioned that she very much enjoyed the zucchini crostada that her daughter-in-law made (even though she hates zucchini). But...that's another story.

The end.


Kale Chips


Prep time: 5 minutes
Total time: 20 minutes
Yield: serves 4 as an appetizer

Ingredients:

2-3 bunches of kale, washed, stemmed and torn into bite-sized pieces
2 tablespoons of extra virgin olive oil
1 teaspoon of sea salt (or to taste)

Preparation:

1. Preheat the oven to 325 degrees.

2. Toss the kale with the olive oil in a large bowl.

3. Place on 2 baking sheets and sprinkle with sea salt. Bake for 15-20 minutes, or until the leaves are crisp and beginning to turn golden. Serve immediately, or at room temperature.

Monday, July 5, 2010

Weekending


Summer is where the girls go barefoot and their hearts are as free as their toes.


Hope you enjoyed celebrating your freedom this weekend too!


Sunday, June 27, 2010

Space Odyssey: Meet Kohlrabi


This gorgeous slaw, came from a strange orb, that looks not unlike a UFO...but is even more bizarre because it sprouts tentacle-like arms from all sides. It tastes sort of like radishes, but it's not spicy, and sort of like broccoli stems, but it's not sulfurous, and sort of like cucumbers, but it's not watery, and sort of like jicama, but it's not starchy. It is cool, crisp, moist and quite delicious and just what you want to eat on a hot and sultry summer night... like last night, where the fog was so thick the sea was totally obscured, the trees were dripping water like it had just rained, and the low, the LOW was 70 degrees. Ugh.

Kohlrabi tastes good on its own, but it tastes even better when it's dressed up a bit. I decided to julienne it, along with some snap peas and spring onions. Julienne is just a fancy word for slicing it into matchstick pieces. I was lazy, so my matchsticks were big, but if you care about uniformity, use your mandoline slicer or julienne peeler. If you're in your less-than-fully-equipped summer kitchen, and lack certain tools, it's not hard to do it on your own. Peel the kohlrabi, slice it thinly, then stack it and slice it into small matchsticks. ( Works for potatoes too, if you're ever inclined to make French fries.)

The resulting salad, tossed in a ginger dressing was everything I could have hoped for....zingy, bright and refreshing. And I would absolutely make this again if I ever get another kohlrabi in our CSA basket or find one at the farmers' market. If not, the I might substitute cucumbers, and/or broccoli stems (slaw) for the kohlrabi. I think it would also be great with a handful of chopped peanuts tossed on top just before serving (we didn't have any). Luckily, the salad kept well too and we enjoyed the leftovers for lunch again today!


Asian Kohlrabi Slaw

Prep time: 20 minutes
Total time: 20 minutes
Yield: serves 4, with leftovers

Ingredients:

1 kohlrabi, peeled and julienned and cut into 2-inch pieces (sliced into matchsticks)
1/2 pound of snap peas, de-stringed and julienned
4 scallions, julienned and cut into 2-inch pieces
1 jalapeno pepper, seeded, de-veined and diced
1 handful of cilantro, chopped
1 thumb of ginger, peeled and grated
1/4 cup rice wine vinegar
2 tablespoons canola (or other plain tasting) oil
1 teaspoon sesame oil
1 teaspoon soy sauce
1 teaspoon sugar
Chopped salted peanuts (a handful), optional

Preparation:

1. Toss kohlrabi, snap peas, scallions, jalapeno and cilantro in a large bowl. Set aside.

2. In a smaller bowl, whisk ginger, vinegar, oils, soy sauce and sugar until combined.

3. Drizzle dressing over the kohlrabi mixture and toss well to coat thoroughly. Serve immediately, or chill until ready to eat. Top with peanuts (if using) just before serving.

Weekending


Summer afternoon - summer afternoon;
to me those have always been
the two most beautiful words in the English language.
~Henry James

Saturday, June 26, 2010

The Case of the Smuggled Tomatoes


The tomatoes to your left, were picked off my tomato vines in California with only their first blush of red, carefully tucked in my carry-on, and placed on the window sill here in Cape Cod to ripen. Do you have any idea how difficult it is to transport tomatoes in a bag onto an airplane? Well, it is! Not only are there heavy books and magazines to contend with...but also feet....and beverage carts....

Anyway, they made it, ripened beautifully and were tossed into a salad of arugula, corn, chicken and blue cheese earlier this week. And they were worth the effort to transport, because unlike backyard eggs, you really can tell the difference in flavor with homegrown tomatoes! The arugula came from the FM here in Bass River and the corn from Jersey (shhh)....It was a fantastic and simple summer meal. As all summer meals should be, no?


Arugula Salad with Corn, Tomatoes, and Blue Cheese
adapted from Everyday Food

There are so many things going on in this salad, I feel it needs minimal dressing. But if you like your salads more heavily coated, you may want to double the lemon and olive oil. This would make for a fantastic lunch or light dinner.

Prep time: 20 minutes
Total time: 20 minutes
Yield: serves 2ish

Ingredients:

1 bag of baby arugula
2 large tomatoes, sliced
2 ears of corn, steamed for 2-3 minutes until tender and sliced off the cob *
1/2 cup sliced red onion
2 cooked chicken breast halves, sliced
1/4 cup crumbled blue cheese
juice from one lemon
2 tablespoons olive oil
pinch of salt and pepper

Preparation:

1. Place arugula in a large salad bowl. Add in tomatoes, corn, red onion, chicken breast, and blue cheese.

2. In a separate small bowl, whisk together the lemon juice and olive oil until combined. Add a pinch of salt and pepper to taste.

3. Toss salad with dressing until lightly coated. Taste for seasoning and serve immediately.

*You can also try microwaving your shucked corn. Place it on a plate and cover it with a paper towel. Microwave it for about one minute per ear.