Showing posts with label Cape Cod. Show all posts

Friday, June 19, 2009

The Natives Are Getting Restless


Back in California, we are lucky to have strawberries year round at our farmers' markets. The are usually ripe throughout, and consistently sweeter than anything you might find at the grocery store. Contrast that with the berries available on Cape Cod, and all over New England for that matter, for a few fleeting weeks in early summer. The poor souls who call these parts home must fight over every little pint and quart basket that gets delivered to farm stands and green markets, knowing that if they miss their chance for "Native Strawberries" they have to wait another whole year to get a taste. Folks swear they are better than strawberries from any other place, but I personally suspected that they were so berry deprived that they were viewing the world through jam-colored lenses. After all, the strawberries I buy nearly every week are pretty darn delicious.


But you know what they say about assuming...I must admit, that the so-called Native Strawberries are hands-down the most delicious berries I have ever tasted, and I have nibbled a lot of them in my lifetime. They are smaller than the kinds I usually buy, and softer too. Deep red throughout and gently perfumed, they are sweet with a subtle tart undertone that rounds out their flavor. I was planning on making jam, or syrup, or pie, or even shortcake, but after I got a taste, I didn't want to cook these delicate beauties, or undermine them by drenching them with cream or even sugar. They are perfect just as they are. And it was pretty difficult to resist eating the entire quart by myself and save enough for dessert.


I decided that crisp and buttery shortbread cookies would make a fine accompaniment to the berries and quickly threw together a batch, using my (slightly modified) grandmother's recipe. Requiring just a few ingredients and one bowl, they are easy to make when you don't want to dirty your mixers (or don't have a mixer to use...as is the case in this summer house). I usually roll mine out to a quarter-inch thickness, then use cookie cutters to cut them into cute shapes (they are a Christmas favorite). But this afternoon, I simply rolled them into a log, refrigerated them, then cut them into quarter-inch disks. It worked like a charm, and they were so good with our fresh berries. They almost looked like little sand dollars, which would make an appropriate Cape Cod name for these most delectable treats.

The season here is almost coming to an end. The nice lady at Setucket Farm Stand told me that they would only be available for 10 more days, unless we get a lot of rain. It poured today, but I hope that I get one more chance to have some native berries this year...


Cape Cod Sand Dollars
makes 1 1/2 dozen cookies

In a large bowl, blend 1 stick (1/2 C) of soft butter with 1/4 C powdered sugar and and 1/2 t pure vanilla extract. With a wooden spoon, stir in 1/2 C flour and a pinch of salt. Stop mixing when the dough has just come together, or you risk overworking it. Wrap with plastic wrap and roll into a log. Refrigerate for at least an hour.

Preheat the oven to 350 degrees. Cut the log into 1/4 inch slices and place on a cookie sheet. Bake for 8-10 minutes or until just golden around the edges, but still pale. Cool on a rack.

Dough can also be rolled out to 1/4 inch thick and cut into shapes with cookie cutters.

Thursday, June 18, 2009

A Summer Tradition


Cape Codders love their traditions and you'd be hard pressed to find one more beloved than the Cape Cod Baseball League. In it's 114th season, it is arguably the most prestigious summer college ball league in the National Alliance of Summer Baseball. Because it draws top-tier baseball players from universities all over the country, it is considered to be equivalent to "high-A Minor League" baseball, with many of its alumni being drafted to the major leagues. In fact, there are over 1000 current major league players that played in the CCBL. It is one of the few institutions that still uses wooden bats...and believe me, there is nothing more exciting than hearing the crack of the bat when it smashes the ball. (Okay, maybe there is, but I'm trying to write as if I were a major baseball fan...a skill I am still perfecting).


After attending 40 of my sons' little league ball games, I must admit I am suffering from a wee bit of baseball fatigue. But tonight, we piled into our car to head out to our first Y-D Red Sox game of the summer. The kids had a blast chasing down foul balls and both boys got two each. Also, they ate their first snack shack burgers of the season. You should know that Cape League burgers are like none you will find anywhere else. They are cooked up by the gentleman below, who is there every year, preparing his specialties with care. If you are brave enough to eat them, you get a sticker that says, Ask me what I ate at the Y-D Redsox game!


You might be wondering why you need to be brave to eat a burger at the ballgame....CAFO beef notwithstanding...Well, it's because their burgers come on doughnuts. If you order the "Sinker" you will get a burger on a plain (outside), cinnamon (inside) or powdered sugar (down the middle) doughnut. If you'd like cheese on that it's called "over the plate." The other kind is appropriately named "The Hurler." The Hurler comes on a jelly filled doughnut with two huge squirts of canned cheese product. Blessedly, neither of my boys ordered that one, sticking with their usual Sinker, down the middle, over the plate (which translates, of course, to cheeseburger on a powdered sugar doughnut). This year, they've added a new taste treat called the "Screamer" which is served on a Boston Creme doughnut (cream filled with chocolate on top).


The first time I saw this monstrosity I was horrified. I was even more disgusted when my children ordered their own. But now, I hardly bat an eye...I've even had a bite, and it wasn't really half bad. Alright, it was half bad....but not nearly as revolting as I expected it to be. So if you'd like to recreate your own Cape League tradition at your home, here is how you can make your own Sinkers and Hurlers.


Cape Cod Sinkers and Hurlers

Grill hamburger patties to your desired doneness. Take a powdered sugar, cinnamon, plain or jelly-filled doughnut and slice it crosswise. Grill it briefly to give it a nice toasty crunch. Place the burger (with cheese or without) on the doughnut. Don't forget the fixin's. Ben likes his with ketchup, mustard and relish. Yummy?

Wednesday, May 13, 2009

Just Roll With It


You probably have already realized this, but if you haven't, I feel I should come clean about a few things. First of all, there has been a frightening paucity of actual cooking going on in my house, which is hilarious, given that I supposedly live for it...well, that and the eating part. And second, my heart and mind have a severe eastward bearing, as if there is a giant magnet pulling me along. These two things, coupled with a ridiculous baseball schedule (yes we are STILL playing and I get to be at the baseball field for five (5!!) hours tonight), make for some interesting dinner preparations.

So tonight, to continue on my path of actual non-cooking, and my Cape Cod mentality, I will be making lobster rolls to take along to the ball games. Those frozen langostino tails I have told you about from Trader Joe's are actually pretty good. Tender, not at all fishy, and quite lobster-esque in flavor, they will hopefully help satisfy my yen until I can eat an actual lobster, in about a month (hopefully).

Disturbingly, the west coast fails to appreciate the beauty that is the top split hot dog bun, which I have come to love. Instead we must make due with the ones that are slit through the side, or pay a dollar each for unsliced buns from Bristol Farms. Each year at the end of the summer, I stock up on a few bags of top split buns, and hope they make it home relatively undamaged. There they wait in the freezer and are whipped out whenever I need a taste of my home away from home. The flavor is exactly the same, but the east coast kind have nice tall sides that can be toasted in butter, which is an essential component of a good lobster roll. These toast okay too, but instead of having crisp sides, as is usual, you get a crisp buttery top and bottom. We'll suffer through it.


Though there are many variations on the classic, I prefer them prepared simply. Mayonnaise, slivers of celery and a pinch of salt and pepper are all you really need. If I'm feeling really crazy, I might throw in a chopped green onion or some fresh dill, but usually I'm not. And the lobster should be a good mix of tail and claw meat, not left in huge chunks, but not chopped up small either. I will make a real version for you this summer. But for now, the langostino tales and side split buns will have to make do. If I close my eyes, I might be able to imagine that I am eating the real thing, and instead of sitting at my sons' little league games, I'm sitting at the high school ball field watching some good Cape League baseball. Go Y-D Red Sox!


P.S. I apologize in advance for the increasing frequency of postings about Cape Cod. It is only going to get worse...just wanted to give you the heads up!

Makeshift (or Desperate Times) Lobster Roll
makes 4

Melt some butter (1 T) in a medium skillet over medium high heat. Add the buns (4) and brown on each side. Toss 12 ounces of thawed langostino tails (or cooked lobster or cooked chopped shrimp) with 1/2 C mayonnaise, a squeeze of fresh lemon juice, 1 stalk of slivered celery, and a pinch of salt and pepper. Open bun and add a layer of baby lettuce. Pile in langostino salad and carefully wrap in parchment paper. Bring along to your sons' baseball games and close your eyes as you eat it. You just might be able to imagine you are eating the real thing somewhere where the real thing is served. Relax and smile. You'll be there soon enough.

Tuesday, May 12, 2009

Ice Cream for Breakfast


The other morning I was quite surprised when my sweet daughter asked for a strawberry ice cream cone for breakfast. What was even more surprising to me was my response. Somewhere between my brain and my mouth, and completely outside my control, my reply changed from the most obvious no, to yes. Yes? Did I actually just say that? I did, in fact, answer in the affirmative. As I looked over at her, her eyes widened in disbelief and a smile spread out across her face like so much warm sunshine through my kitchen window. Yes, I repeated, a strawberry ice cream cone would make a fine breakfast (especially since it was the homemade variety, which just oozes health and nutrition).

I have always had a soft spot for strawberry ice cream. I remember walking down to Thrifty's with my mom for a scoop on occasion, stopping to feed the neighbor's horses carrots on our route. My mother never let me have a sugar cone, only plain ones. It wasn't until I went out to ice cream with my future husband was I tasted the illicit variety. The name 'sugar cone' implies something sweet and over the top, kind of like adding insult to injury, I think. But in reality, I doubt if there is any more sugar in a sugar cone, than in a plain one. But there is certainly a textural difference. Plain cones are light and fluffy and get soggy if you don't eat ice cream quick enough. While sugar cones have more crunch, and are a nice toasty brown which gives them a cookie-like flavor. And they remain crisp, right down to the last bite, even when ice cream has wedged itself into the very tip.


During the summer in Cape Cod, we frequent an ice cream parlor that's in a converted farmhouse. It has a wide front porch and lawn where Adirondack chairs are set out so that folks might sit and enjoy their cones and watch the children frolic about after seemingly inhaling their own desserts. Evenings are lovely there, warm still, and breezy, marred only slightly by all manner of buzzing and biting creatures. I love that all their ice cream is made on site and is named after Cape Cod towns and points of interest like Dennis Double Chocolate and Chappaquiddick Chocolate Chip. We always let the kids order regular-sized scoops, and always on sugar cones. It's the only kind of cone my kids know. (Edited to add that my eldest son reminded me that frosty soft-serve ice cream always comes on plain cones. Right, I forgot about that.)

Making ice cream isn't really as complicated as you might think, and as long as you have an electric machine, it will be churned and frozen in twenty minutes. You won't even have a blister to show for it. Back in the day, when I was a kid, we used to have one of those old wooden crank ice cream makers. We kept it in an outside closet that stored our pool chemicals and spare ping pong paddles and balls. It was only trudged out once a year, around the Fourth of July holiday, and was a task delegated to the children. At least the cranking part. My mom would make the custard in the kitchen, then send us outside with the rock-salt and ice filled barrel to crank and crank away. We never tired of it because we knew that the delectable results were well worth our efforts. Plus, it was really fun.

Last summer I tried to make ice cream in one of those ice cream making balls. I thought it would be fun for the children to roll it around on the grass outside, and it only takes twenty minutes or so to transform from milky vanilla flavored custard to frozen delight. But after only a few short moments, the children tired of the task and left me to roll the orb around by myself. It wasn't the entertaining activity I had imagined, nor were the results as good as I remember from my hand-cranking days. The bits of grass on the outside of the ball had somehow invaded the ice cream, along with a smidgen of rock salt. Grassy and salty ice cream wasn't exactly what I had in mind. But if it was a flavor at the Cape Cod Creamery, I might call it Marsh Madness. It has a nice ring to it, don't you think?


I make ice cream often in my new-fangled electric maker. I especially like this strawberry ice cream recipe because it requires only 4 ingredients-cream, milk, sugar and strawberries. No custard making is necessary and it comes together in a snap. If you heat the milk and cream with the sugar until just before the boiling point then let it cool, it makes for a creamier version, but honestly, I have just whisked super-fine sugar into the cold milk and cream and dumped it immediately in the frozen bowl of my ice-cream maker with fine results. Just let it sit out on the counter for about 15 minutes before you want to serve it and it will be perfectly scoopable and smooth. The recipe is adapted from one by Susan Branch, who literally hand-writes and illustrates lovely little cookbooks. I own them all and you should too-they're available in my bookstore.


Strawberry Ice Cream

2 C heavy cream
2 C whole milk
1 1/4 C sugar
1 pint of strawberries, hulled and chopped

Heat the cream and milk together until just before the boiling point. Stir in 3/4 C sugar, pour into a bowl and refrigerate until cold. Meanwhile, puree or mash strawberries and remaining 1/2 C sugar together and add to the cream when it's cold. Pour into the bowl of a frozen ice cream maker and freeze according to manufacturers directions. Ice cream will be soft set. Pour into a freezer safe container and freeze until firm (at least a few hours).

Saturday, April 4, 2009

It's 'da Bomb


Every summer, our family stays at my husband's sister's waterfront home in Cape Cod. For some of the time we have the place to ourselves, but the real party starts when they arrive--this time, not only will each family bring their three kids, but there will also be two dogs added into the mix. It really is the most fun we have all year, all cozy together in that old rambling cottage. I think that my sister-in-law would agree that our children, for the most part, spend their summers slathered in muck from the tidal river, bug spray, sunscreen (when we remember), and butter--or at least it seems that way. Every year the 10 of us (12 if you count my husband's parents who live just down the street), manage to consume shameful quantities of butter. Pounds and pounds of it, in fact. We can blame, in part, the fresh clams that we dig out of our backyard (shhh), or the occasional lobster fest. But mostly it is due to our baking...we bake loads of goodies that are practically inhaled the moment the are removed from the oven. I worry about when the kids are older and really hungry...right now there are FIVE boys (11, 9, 9, 7, 4) and my poor daughter (7) who must put up with it all. But the teenage years are fast approaching, and I'm not sure how we will manage to keep up with their appetites.


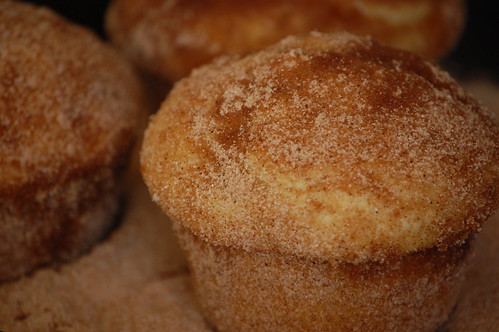
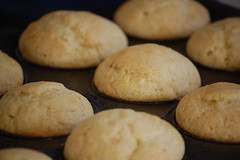
One of our favorite things to bake are these muffins called Dirt Bombs. They come from the Cottage Street Bakery in Orleans, but I found the recipe in this great book. It is hard to describe actually how delicious these muffins are. And really, when I think about it, it's pretty insulting to call them a muffin when they are much, much more. They puff up like so many hot air balloons in the pan, and inside they have the texture of the best cake doughnut I have ever tasted. Painfully rich, these delights are decidedly not a diet food. The fact that they are dipped in butter and cinnamon-sugar after they come out of the oven, brings them right over the top. A bite is ecstasy-I'm not exaggerating-and eating one is more than plenty...unless you are an eleven-year-old boy.


Cottage Street Bakery Dirt Bombs
adapted from The Cape Cod Table

Muffins:
1 1/2 sticks of softened butter
1 C sugar
2 eggs
1 C whole milk
3 C flour
1 T baking powder
1/2 t salt
1/2 t nutmeg
1/4 t cardamom

Cinnamon sugar mixture:
1/2 C sugar
1 1/2 t cinnamon

Dip into:
1/2 stick melted butter

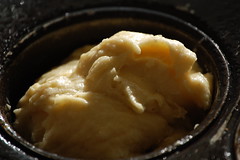
Preheat oven to 400 degrees and grease a regular sized muffin tin. Beat together (a hand mixer is fine) the butter and sugar. Add eggs and mix well. In a separate bowl, sift together flour through cardamom. Pour half of the flour mixture into the butter mixture and mix gently. Add milk, then remaining flour mixture. Beat just until combined. Spoon into prepared muffin tins and bake for about 15 minutes, or until muffins are cooked throughout.

Remove from oven and take muffins out of tin. Dip muffin tops in remaining melted butter and roll in a bowl with the cinnamon-sugar mixture until they are fully coated.

Wednesday, December 3, 2008

Sugar and Spice and Everything Nice


Regarding nuts there are two camps (well three if you count those who are deathly allergic to them): one group just loves nuts and all things nutty and one group not so much. I guess that I fall somewhere in the middle. I do like nuts as solo fliers. I make them often when we are entertaining to munch on with our cocktails, I like them in salads or sprinkled on my veggies, but I am not a huge fan of nuts in sweet treats like quick breads, cookies and especially fudge. That being said, I am crazy for sugared nuts! I love honey roasted peanuts to be sure, by my hands-down favorite are sugared spiced walnuts or pecans. I love them on my caramel apples and in my oatmeal, in my winter salads and just right out of the bowl. And nuts are good for me, right? Practically a health food, I think!

In Cape Cod there is a woman who makes these amazing sugared walnuts called Wicked Walnuts. They are outrageously delicious and addictive and the recipe is obviously a closely guarded secret. Even though I do have a slight walnut sensitivity (they make my mouth peel), that is a small price to pay for eating them! So since I am not currently on the Cape, I will try to recreate the recipe myself....or at least come up with something delicious to tide me over in the meantime.

Her walnuts are sweet and salty, with just a bit of heat, if I recall correctly. And they come packaged with sweetened, dried cranberries too. So this morning I set off on my journey through the wonderful world Internet recipe searches, and came across quite a few recipes, many involving making a caramel out of sugar and spices and then tossing in toasted walnuts. That didn't sound quite right to me. Finally I decided that I would try my old recipe for sugared pecans and see if that did the trick. The recipe is a simple one: toss the nuts with a beaten egg white, and then shake them in a bag of sugar, salt, cinnamon...and my new addition, a dash of cayenne. They are baked slowly, and fill the kitchen with a most heavenly smell!

Update: these walnuts, while delicious, still lacked something when they came out of the oven. I referred back to the picture on the Wicked Walnut website and saw that her's had visable sugar on them. So I created a sugar/spice mixture and tossed the walnuts with it. Bingo! They are perfect.


Sugar and Spice Walnuts

1/2 pound walnut pieces and halves
1 egg white, beaten until frothy
1/2 C sugar
1/2 t salt
3/4 t cinnamon
1/4 t cayenne pepper
1/2 C sweetened dried cranberries

Sugar Topping

1/4 C sugar
1/2 t cinnamon
pinch cayenne
1/2 t salt

Preheat oven to 300 degrees. Toss walnuts with egg white in a medium sized bowl. Place sugar, salt, and spices into a large zip top bag. Remove walnuts from egg white with a slotted spoon, letting any excess egg drip out. Place nuts in the sugar bag and shake vigorously to coat. Pour out onto greased cookie sheet and separate nuts. Bake for 35-40 minutes or until dry and toasted.

Mix sugar topping in a large bowl. Gently break apart walnuts with a fork or spatula. Place in the bowl with the sugar and toss to coat. Place back on the cookie sheet to cool. When cool, toss with the cranberries and seal in air-tight containers.

Monday, November 17, 2008

Cranberry Glazed Chicken


I have a dilemma. There is a beautiful bag of cranberries taunting me from my refrigerator. Every time I open my produce drawer, they call out to me, begging to be cooked and eaten. These aren't just any supermarket cranberries, mind you, but rather cranberries that were specially selected by my in-laws and shipped to us straight from a Cape Cod bog. I have big plans for these little gems. They are to go in the obligatory cranberry bread for Thanksgiving morning, and to be put into the fresh cranberry relish for Thanksgiving dinner. I really don't have many to spare...but tonight I could not resist their allure and so I made roasted chicken breasts with a cranberry glaze, using just a cup of the precious fruits. This recipe is adapted from Everyday Food.

Chicken with a Cranberry Glaze
Serves 4

4 bone-in, skin-on chicken breasts (or one large split turkey breast)
butter
dried sage
dried thyme
2 C chicken or turkey stock
1 onion, diced
1 C cranberries
1 t corn starch

Preheat oven to 400°.

Carefully lift skin on chicken breasts and sprinkle a pinch of sage and thyme and place 1 pat of butter. Replace skin over breast and sprinkle over a pinch of salt and pepper. Roast breasts for about 30-40 minutes, or until they reach an internal temperature of 160°.

Meanwhile, saute onion in 1 T butter until soft (about 8 minutes) in large sauce pan. Add about 1/2 t thyme and sage and stir for one minute. Add 2 C chicken or turkey stock and boil for about 10 minutes or until reduced slightly. Strain stock and then add cranberries and simmer until cranberries pop and soften, about 8 minutes. Make a slurry with 1 t corn starch and 1 t water. Stir to combine then whisk into sauce pan to thicken sauce.

Pour sauce over chicken and serve with rice or mashed potatoes.

Friday, November 14, 2008

Clam Pizza


Today I broke my own promise to try to buy locally grown and harvested foods when I bought a dozen littleneck clams from Bristol Farms. I could not resist them...they looked like my beloved Cape Cod in winter; grey, stoic and nestled in a bed of ice. I closed my eyes and inhaled their briny perfume and could almost picture myself there, a fragrant sea breeze coming up from the water. It is amazing how a meal, a smell or a song can transport me across time, or across a continent. Tonight I can pretend I am back on the Cape, with rain pattering on my window and a fire in the fireplace. The smell of woodsmoke mixing with the scent of the ocean is an intoxicating combination...

But alas, I am here, in southern California and the smoke I smell is probably another mountain on fire, and the "ocean breeze" is really the Santa Ana's blowing through my kitchen. But regardless of our location, we will dine and remember, with a clam pizza, flavored with the sweet meat from the clams, some of their liquor, olive oil spiked with garlic, and Pecorino cheese. A simple dish, yet exquisitely complex in flavor.

Clam Pizza

one recipe pizza dough (see dough recipe here)
one dozen littleneck clams
2 cloves garlic
1/4 C olive oil (or so)
2 T chopped flat-leaf parsley
1/4 C Pecorino cheese, grated
1/4 C Mozzarella cheese, grated

Preheat oven to 500 degrees for one hour.

Shuck clams (and I will admit that this was WAY harder than we expected). Those buggers were shut tight, and we had to seriously pry them open with a knife. For more tips on how to shuck clams look here.

Chop clam meat and reserve it and liquor (juice from shell) in a bowl. Stretch dough according to directions. Mince garlic and stir into olive oil. Drizzle over crust dough. Sprinkle on clam meat, parsley, and cheeses. Bake for 10-15 minutes or until crust is as crisp as you like. Drizzle on a bit more olive oil and serve.


Monday, November 10, 2008

Preserving My (In)Sanity


I have a problem; an addiction really. Or perhaps it is just an obsession. But what ever you want to call it, I cannot stop canning things "for the winter." Like the mothers (one human, one bear) in the beloved children's story Blueberries for Sal, I have gathered all the blueberries I could get my hands on (and the peaches, and apricots, and strawberries and apples, and tomatoes and on and on). Here in earthquake country we are encouraged to keep several days worth of supplies on hand for the inevitable "big one." But instead of stockpiling water, flashlights, radios, energy bars and batteries like a sensible person, I stockpile beautiful fruits in jars, filling my pantry to overflowing.

So far since late spring, I have managed to make jams from strawberries, strawberries and rhubarb, apricots, tomatoes and chilis, and peaches and blueberries. I have made jelly from Thomcord grapes, and sauce from apples and tomatoes. And today I made six half pints of cranberry chutney. I still have jars of applesauce and tomato chili jam on my counter because I have no room in my pantry...and now this.

It is as if I am operating from some primal instinct, as a squirrel gathers nuts, or a pioneer woman stuffs her root cellar. It is so not necessary, but it is deeply satisfying all the same. It feels like a connection to the past, while preserving the future, quite literally.

In Sandwich, Massachusetts, a lovely little Cape Cod village we visit each summer, they keep the jam-making tradition alive in their Green Briar Jam Kitchen. Volunteers lead workshops on how to make jams, jellies and other preserves, and when we visit, we can smell the sweet fragrance from well up the road. It is not hard to make jams, really, and with a few supplies on hand, it can be made in a jiffy. The recipe for Cranberry Chutney was inspired by one from the Green Briar, and the cranberries were shipped to us by my mother-in-law from Annie's Crannies on the Cape. It is tart, boldly flavored, and a delightful shiny crimson color that reminds me of the holidays.

For tips on preserving I suggest you visit the following website:


Basic supplies that I use for jamming are a large dutch oven, my pasta cooker (with removable insert), ball jars with 2 piece lids, tongs for jars, and a funnel. That's it! This recipe is much easier to make than jam (you don't need to worry about it setting) and it comes together quickly so that the whole project can be done in less than an hour. I'm planning on giving these to friends for Christmas (and finally clearing off my counter)!


Cranberry Chutney

makes about 5-6 8 oz. jars

1 pound of cranberries
3/4 pound of apples, peeled, cored and chopped
1 medium onion, diced
1/2 lemon, seeded and diced
1/2 C raisins
1 C brown sugar
1/4 C candied ginger
1/4 C cider vinegar
1/2 C water
1/2 t salt
1/2 t chili powder
1/2 t dry mustard
1 stick of cinnamon

Combine all ingredients in a large dutch oven and bring to a boil. Reduce heat and simmer for 25 minutes or until thick. Skim foam from the top and remove cinnamon stick.

Pour into sterilized jars and seal according to manufacturers directions.


Friday, October 31, 2008

Salty and Sweet and Good to Eat


Here is my version of the Salty Oat cookies sold in Cape Cod. I thought they were a pretty good approximation (of course they won't share their secret recipe). They are chocolaty, crispy on the outside, chewy on the inside and have just a touch of salt on top. My husband thought they were delicious and was so disappointed that they went to our friends, except the two that he ate...shhhh!

Salty Chocolate, Chocolate Chip Oatmeal Cookies
makes about a bakers dozen

1 stick of softened butter
3/4 C brown sugar
1 egg
1 t vanilla
1/2 C flour
1/4 C good quality cocoa powder
1/2 t baking soda
1 1/4 C oats
1/4 C sweetened, shredded coconut
1/2 C chocolate chunks or chips (semisweet)
flaked sea salt (Maldon works well)

Preheat oven to 350°

Beat butter and brown sugar together until well blended. Add egg and vanilla. Sift together flour, cocoa powder, and baking soda and add to butter and sugar mixture and stir to combine. Add oats, coconut and chocolate chunks and mix well. Plop tablespoon sized mounds onto cookie sheet spaced 2 inches apart. Sprinkle salt on top of each cookie. Bake about 10-12 minutes, or until cookies are set.

Wednesday, October 22, 2008

Sex in a Jar


While I was on Cape Cod this summer, I visited a lovely little shop called the Nantucket Smoke-house in Chatham, Massachusetts. It is owned by Peter O'Donovan and Marco Protano. They have managed to stir up quite a lot of praise for their excellent smoked fish, as well as their eclectic gourmet market which stocks local and imported foods. (Visit their website www.nantucketwildgourmet.com) While we were there Marco spooned out the most delicious sauces and jams for us to sample and I fell in love with one called Tomato Chili Melange. It tasted like sex in a jar....sticky, sweet and spicy all at the same time. I simply had to learn how to make my own.

Well with 10 pounds of tomatoes to go, and going fast, I had to get to work. Researching recipes on the Internet can occupy my time for hours each day and finding the right tomato chili jam recipe was quite the challenge. It seems that nobody in the states has a taste for it, but the Brits love the stuff. So after some sleuthing and recipe translating (why we never adopted the metric system is beyond me), I think I have come up with a most delicious recipe. And because it contains plenty of acidity from the vinegar, it is safe to play around a bit with tomato jam recipes without risking getting anyone sick from botulism. Adapted from several sources, it is not an exact replica of what I tasted this summer, but it comes pretty darn close. Eat it with a cheese platter, on sandwiches, with duck, as a glaze on chicken, pork or just out of the jar. It is quite spicy, but the long cooking and sugar temper the heat somewhat.


Tomato Chili Jam

4 large red peppers, seeded and chopped
8 medium tomatoes, chopped
16 fresh red jalapenos, chopped (with seeds)
16 cloves of garlic
1 3/4 C red wine vinegar
5 C brown sugar
4 thumbs of ginger (peeled)
the juice of 2 fresh limes

Chop and puree the red peppers, jalapenos, garlic and half of the tomatoes and pour into large stockpot. It is important not to discard the seeds from either the tomatoes or jalapenos because they contain pectin that helps the jam to set. Dice remaining tomatoes and put into pot with puree. Add vinegar, sugar and ginger and bring to a boil. Skim foam and simmer for around 45 minutes, stirring often. Jam is set when it becomes quite syrupy and very thick. I like to take my jam off the heat when I can see the bottom of the pot when I am stirring. Squeeze the juice of two limes into jam and stir. Remove any large lumps of ginger with a clean spoon. Pour into warm, sterilized jars, seal and process in a hot water bath for 15 minutes.